Friday, July 20, 2018

PyGTK - DrawingArea Class

PyGTK - DrawingArea Class


 The DrawingArea widget presents a blank canvas containing a gtk.gdk.Window on which objects such as line, rectangle, arc, etc. can be drawn.
PyGTK uses Cairo library for such drawing operations. Cairo is a popular 2D vector graphics library. It is written in C., although, it has bindings in most Languages such as C++, Java, Python, PHP etc. Cairo library can be used to draw on standard output devices in various operating systems. It can also be used to create PDF, SVG and post-script files.
In order to perform different drawing operations, we must fetch the device on text of the target output object. In this case, since the drawing is appearing on gtk.DrawingArea widget, the device context of gdk.Window contained inside it is obtained. This class has a cairo-create() method which returns the device context.
area = gtk.DrawingArea()
dc = area.window.cairo_create()
The DrawingArea widget can be connected to the callbacks based on the following signals emitted by it −
RealizeTo take any necessary actions when the widget is instantiated on a particular display.
configure_eventTo take any necessary actions when the widget changes size.
expose_eventTo handle redrawing the contents of the widget when a drawing area first comes on screen, or when it's covered by another window and then uncovered (exposed).
The Mouse and Keyboard events can also be used to invoke callbacks by add_events() method of the gtk.Widget class.
Of particular interest is the expose-event signal which is emitted when the DrawingArea canvas first comes up. The different methods for drawing 2D objects, that are defined in the Cairo library are called from this callback connected to the expose-event signal. These methods draw corresponding objects on the Cairo device context.
The following are the available drawing methods −
  • dc.rectangle(x,y,w,h) − This draws a rectangle at the specified top left coordinate and having givwn width and height.
  • dc.arc(x,y,r,a1,a2) − This draws a circular arc with given radius and two angles.
  • dc.line(x1, y1, x2, y2) − This draws a line between two pairs of coordinates.
  • dc.line_to(x,y) − This draws a line from the current position to (x,y)
  • dc.show_text(str) − draws string at current cursor position
  • dc.stroke() − draws outline
  • dc.fill() − fills shape with current color
  • dc.set_color_rgb(r,g,b) − sets color to outline and fill with r, g and b values between 0.0 to 1.0

Example

The following script draws different shapes and test using Cairo methods.
import gtk
import math
class PyApp(gtk.Window):
   def __init__(self):
      super(PyApp, self).__init__()
      self.set_title("Basic shapes using Cairo")
      self.set_size_request(400, 250)
      self.set_position(gtk.WIN_POS_CENTER)
      self.connect("destroy", gtk.main_quit)
  
      darea = gtk.DrawingArea()
      darea.connect("expose-event", self.expose)
  
      self.add(darea)
      self.show_all()
  
      def expose(self, widget, event):
      cr = widget.window.cairo_create()
  
      cr.set_line_width(2)
      cr.set_source_rgb(0,0,1)
      cr.rectangle(10,10,100,100)
      cr.stroke()
  
      cr.set_source_rgb(1,0,0)
      cr.rectangle(10,125,100,100)
      cr.stroke()
  
      cr.set_source_rgb(0,1,0)
      cr.rectangle(125,10,100,100)
      cr.fill()
  
      cr.set_source_rgb(0.5,0.6,0.7)
      cr.rectangle(125,125,100,100)
      cr.fill()
  
      cr.arc(300, 50, 50,0, 2*math.pi)
      cr.set_source_rgb(0.2,0.2,0.2)
      cr.fill()
  
      cr.arc(300, 200, 50, math.pi,0)
      cr.set_source_rgb(0.1,0.1,0.1)
      cr.stroke()
  
      cr.move_to(50,240)
      cr.show_text("Hello PyGTK")
      cr.move_to(150,240)
      cr.line_to(400,240)
      cr.stroke()
PyApp()
gtk.main() 
The above script will generate the following output −
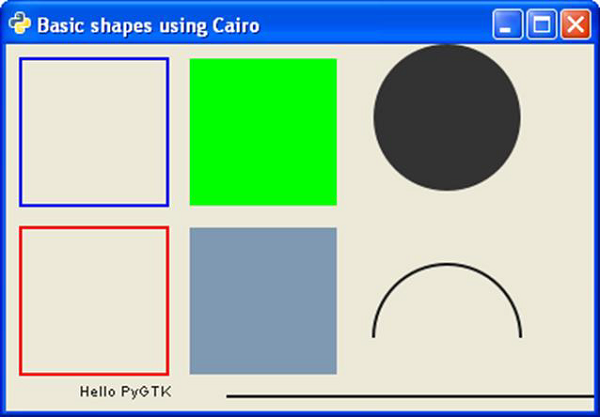
Basic Shapes Cairo

PyGTK - Image Class

PyGTK - Image Class


 This class is also inherited from the gtk.Misc class. The object of the gtk.Image class displays an image. Usually, the image is to be loaded from a file in a pixel buffer representing gtk.gdk.Pixbuf class. Instead a convenience function set_from_file() is commonly used to display image data from file in a gk.Image widget.
The easiest way to create the gtk.Image object is to use the following constructor −
img = gtk.Image()
The following are the methods of the gtk.Image class −
  • Image.set_from_file() − This sets the image data from the contents of the file.
  • Image.set_from_pixbuf() − This sets the image data from pixmapin which the image data is loaded for offscreen manipulation.
  • Image.set_from_pixbuf() − This sets the image data using pixbufwhich is an object containing the data that describes an image using client side resources.
  • Image.set_from_stock() − This sets the image data from the stock item identified by stock_id.
  • Image.clear() − This removes the current image.
  • Image.set_from_image() − This sets the image data from a client-side image buffer in the pixel format of the current display. If the image is None, the current image data will be removed.

Example

In the following program, the gtk.Image object is obtained from an image file. It is further added in the toplevel window.
import gtk
class PyApp(gtk.Window):
   def __init__(self):
      super(PyApp, self).__init__()
      self.set_title("PyGtk Image demo")
      self.set_size_request(300, 200)
      self.set_position(gtk.WIN_POS_CENTER)
      image1 = gtk.Image()
      image1.set_from_file("python.png")
      self.add(image1)
      self.connect("destroy", gtk.main_quit)
      self.show_all()
PyApp()
gtk.main()
The above code will generate the following output −
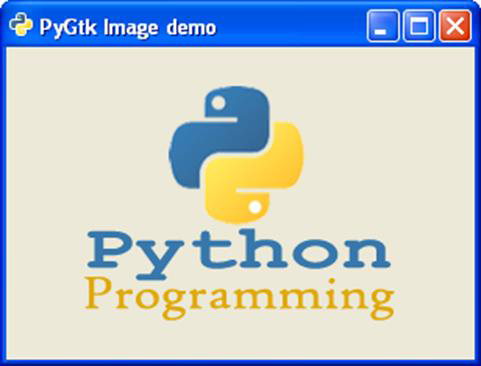
Image Demo

PyGTK - Arrow Class

PyGTK - Arrow Class


 The gtk.Arrow object is used to draw simple arrow pointing towards four cardinal directions. This class is inherited from the gtk.Misc class and the object will occupy any space allocated it, for instance, a Label or Button widget.
Typically, Arrow object is created using the following constructor −
Arr = gtk.Arrow(arrow_type, shadow_type)
The predefined arrow_type constants are −
  • gtk.ARROW_UP
  • gtk.ARROW_DOWN
  • gtk.ARROW_LEFT
  • gtk.ARROW_RIGHT
The predefined shadow_type constants are listed in the following table −
gtk.SHADOW_NONENo outline.
gtk.SHADOW_INThe outline is beveled inward.
gtk.SHADOW_OUTThe outline is beveled outward like a button.
gtk.SHADOW_ETCHED_INThe outline itself is an inward bevel, but the frame bevels outward.
gtk.SHADOW_ETCHED_OUTThe outline is an outward bevel, frame bevels inward.

Example

In the following example, four Button widgets are added to an Hbox. On top of each button, a gtk.Arrow object pointing UP, DOWN, LEFT and RIGHT respectively is placed. The HBOX container is placed at the bottom of the toplevel window with the help of an Alignment container.
Observe the code −
import gtk
class PyApp(gtk.Window):
   def __init__(self):
      super(PyApp, self).__init__()
      self.set_title("Arrow Demo")
      self.set_size_request(300, 200)
      self.set_position(gtk.WIN_POS_CENTER)
  
      vbox = gtk.VBox(False, 5)
      hbox = gtk.HBox(True, 3)
      valign = gtk.Alignment(0, 1, 0, 0)
      vbox.pack_start(valign)
  
      arr1 = gtk.Arrow(gtk.ARROW_UP, gtk.SHADOW_NONE)
      arr2 = gtk.Arrow(gtk.ARROW_DOWN, gtk.SHADOW_NONE)
      arr3 = gtk.Arrow(gtk.ARROW_LEFT, gtk.SHADOW_NONE)
      arr4 = gtk.Arrow(gtk.ARROW_RIGHT, gtk.SHADOW_NONE)
  
      btn1 = gtk.Button()
      btn1.add(arr1)
      btn2 = gtk.Button()
      btn2.add(arr2)
      btn3 = gtk.Button()
      btn3.add(arr3)
      btn4 = gtk.Button()
      btn4.add(arr4)
  
      hbox.add(btn1)
      hbox.add(btn2)
      hbox.add(btn3)
      hbox.add(btn4)
  
      halign = gtk.Alignment(0.5, 0.5, 0, 0)
      halign.add(hbox)
  
      vbox.pack_start(halign, False, True, 10)
      self.add(vbox)
      self.connect("destroy", gtk.main_quit)
      self.show_all()
PyApp()
gtk.main()
The above code will generate the following output −
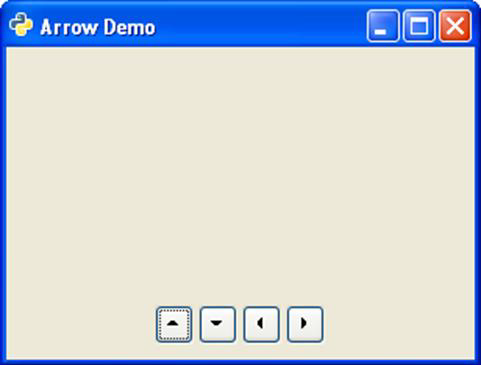
Arrow Demo

PyGTK - ScrolledWindow Class

PyGTK - ScrolledWindow Class


 Scrolled window is created to access other widget of area larger than parent window. Some widgets like TreeView and TextView of native support for scrolling. For others such as Label or Table, a Viewport should be provided.
The following syntax is used for the constructor of the gtk.ScrolledWindow class −
sw = gtk.ScrolledWindow(hadj, vadj)
The following are the methods of the gtk.ScrolledWindow class −
  • ScrolledWindow.set_hadjustment() − This sets the horizontal adjustment to a gtk.Adjustment object
  • ScrolledWindow.set_vadjustment() − This sets the vertical adjustment to a gtk.Adjustment object
  • ScrolledWindow.set_Policy (hpolicy, vpolicy) − This sets the "hscrollbar_policy" and "vscrollbar_policy" properties. One of the following predefined constants are used −
    • gtk.POLICY_ALWAYS − The scrollbar is always present
    • gtk.POLICY_AUTOMATIC − The scrollbar is present only if needed i.e. the contents are larget than the window
    • gtk.POLICY_NEVER − The scrollbar is never present
  • ScrolledWindow.add_with_viewport(child) − This method is used to add a widget (specified by child) without native scrolling capabilities to the scrolled window. This is a convenience function that is equivalent to adding child to a gtk.Viewport, then adding the viewport to the scrolled window.
The following code adds a scrolled window around a gtk.Table object with 10 by 10 dimensions. Since a Table object doesn't support adjustments automatically, it is added in a Viewport.
sw = gtk.ScrolledWindow()
table = gtk.Table(10,10)
Two nested loops are used to add 10 rows of 10 columns each. A gtk.Button widget is placed in each cell.
for i in range(1,11):
   for j in range(1,11):
   caption = "Btn"+str(j)+str(i)
   btn = gtk.Button(caption)
   table.attach(btn, i, i+1, j, j+1)
This large enough table is now added in the scrolled window along with a viewport.
sw.add_with_viewport(table)

Example

Observe the following code −
gtk
class PyApp(gtk.Window):
   def __init__(self):
      super(PyApp, self).__init__()
      self.set_title("ScrolledWindow and Viewport")
      self.set_size_request(400,300)
      self.set_position(gtk.WIN_POS_CENTER)
      sw = gtk.ScrolledWindow()
      table = gtk.Table(10,10)
      table.set_row_spacings(10)
      table.set_col_spacings(10)
      for i in range(1,11):
      for j in range(1,11):
      caption = "Btn"+str(j)+str(i)
      btn = gtk.Button(caption)
      table.attach(btn, i, i+1, j, j+1)
      sw.add_with_viewport(table)
      self.add(sw)
      self.connect("destroy", gtk.main_quit)
      self.show_all()
PyApp()
gtk.main()
The above code will generate the following output −
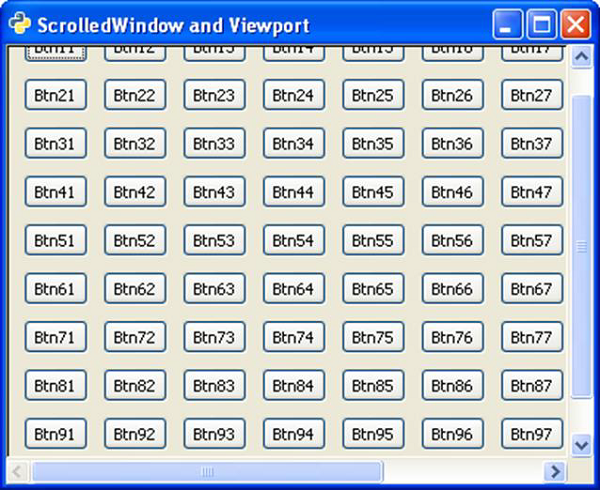
ScrolledWindow

PyGTK - Viewport Class

PyGTK - Viewport Class


 If a widget has an area larger than that of the toplevel window, it is associated with a ViewPort container. A gtk.Viewport widget provides adjustment capability to be used in a ScrolledWindow. A Label widget for instance, doesn't have any adjustments. Hence it needs a Viewport. Some widgets have a native scrolling support. But a Label or a gtk.Table widget doesn't have an in-built scrolling support. Hence they must use Viewport.
ViewPort class has the following constructor −
gtk.Viewport(hadj, vadj)
Here, hadj and vadj are the adjustment objects associated with the viewport.
gtk.ViewPort class uses the following methods −
  • Viewport.set_hadjustment() − This sets the "hadjustment" property
  • Viewport.set_vadjustment() − This sets the "vadjustment" property
  • Viewport.set_shadow_type() − This sets the "shadow-type" property to the value of type. The value of type must be one of −
    • gtk.SHADOW_NONE
    • gtk.SHADOW_IN
    • gtk.SHADOW_OUT
    • gtk.SHADOW_ETCHED_IN
    • gtk.SHADOW_ETCHED_OUT
The gtk.Viewport object emits the set-scroll-adjustments signal when one or both of the horizontal and vertical gtk.Adjustment objects is changed.

PyGTK - ProgressBar Class

PyGTK - ProgressBar Class


 Progress bars are used to give user the visual indication of a long running process. The gtk.ProgressBar widget can be used in two modes — percentage mode and activity mode.
When it is possible to accurately estimate how much of work is pending to be completed, the progress bar can be used in percentage mode, and the user sees an incremental bar showing percentage of completed job. If on the other hand, the amount of work to be completed can be accurately determined, the progress bar is used in activity mode in which, the bar shows the activity by displaying a block moving back and forth.
The following constructor initializes the widget of the gtk.ProgressBar class −
pb = gtk.ProgressBar()
gtk.ProgressBar uses the following methods to manage functionality −
  • ProgressBar.pulse() − This nudges the progressbar to indicate that some progress has been made, but you don't know how much. This method also changes the progress bar mode to "activity mode," where a block bounces back and forth.
  • ProgressBar.set_fraction(fraction) − This causes the progress bar to "fill in" the portion of the bar specified by fraction. The value of fraction should be between 0.0 and 1.0.
  • ProgressBar.set_pulse_setup() − This sets the portion (specified by fraction) of the total progress bar length to move the bouncing block for each call to the pulse() method.
  • ProgressBar.set_orientation() − This sets the orientation of the progress bar. It may be set to one of the following constants:
    • gtk.PROGRESS_LEFT_TO_RIGHT
    • gtk.PROGRESS_RIGHT_TO_LEFT
    • gtk.PROGRESS_BOTTOM_TO_TOP
    • gtk.PROGRESS_TOP_TO_BOTTOM
In the following program, the gtk.ProgressBar widget is used in activity mode. Hence, the initial position of progress is set to 0.0 by the set_fraction()method.
self.pb = gtk.ProgressBar()
self.pb.set_text("Progress")
self.pb.set_fraction(0.0)
In order to increment the progress by 1 percent after 100 milliseconds, a timer object is declared and a callback function is set up to be invoked after every 100 ms so that the progress bar is updated.
self.timer = gobject.timeout_add (100, progress_timeout, self)
Here, progress_timeout() is the callback function. It increments the parameter of the set_fraction() method by 1 percent and updates the text in progress bar to show the percentage of completion.
def progress_timeout(pbobj):
new_val = pbobj.pb.get_fraction() + 0.01
pbobj.pb.set_fraction(new_val)
pbobj.pb.set_text(str(new_val*100)+" % completed")
return True

Example

Observe the following code −
import gtk, gobject
   def progress_timeout(pbobj):
      new_val = pbobj.pb.get_fraction() + 0.01
      pbobj.pb.set_fraction(new_val)
      pbobj.pb.set_text(str(new_val*100)+" % completed")
      return True

class PyApp(gtk.Window):
   def __init__(self):
      super(PyApp, self).__init__()
      self.set_title("Progressbar demo")
      self.set_size_request(300,200)
      self.set_position(gtk.WIN_POS_CENTER)
  
      fix = gtk.Fixed()
      self.pb = gtk.ProgressBar()
      self.pb.set_text("Progress")
      self.pb.set_fraction(0.0)
  
      fix.put(self.pb,80,100)
      self.add(fix)
      self.timer = gobject.timeout_add (100, progress_timeout, self)
      self.connect("destroy", gtk.main_quit)
      self.show_all()
PyApp()
gtk.main()
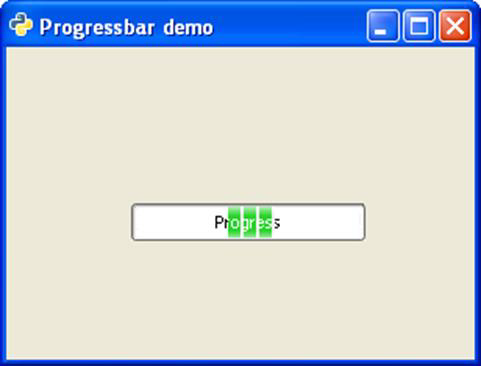
The above code will generate the following output −
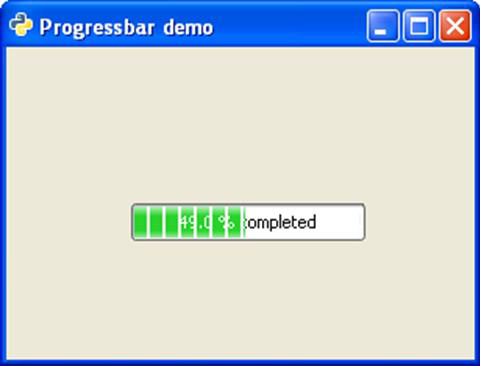
ProgressBar Demo
To use the progress bar in activity mode, change callback function to the following and run −
def progress_timeout(pbobj):
pbobj.pb.pulse()
return True
The back and forth movement of a block inside the Progress bar will show the progress of the activity.
ProgressBar Demo