C fbg vf g
Wednesday, September 29, 2021
Friday, July 20, 2018
PyGTK - Drag and Drop
PyGTK - Drag and Drop
Widgets having associated X Window are capable of drag and drop. In the program, a widget as a source and/or destination for drag-and-drop must first be designated. The widget defined as source can send out the dragged data. The destination widget accepts it when dragged data is dropped on it.
The following steps are involved in setting up a drag-and-drop enabled application −
Step 1 − Setting up a source widget.
Step 2 − The drag_source_set() method specifies the target types for a drag operation −
widget.drag_source_set(start_button_mask, targets, info)
Step 3 − The start_button_mask argument specifies a bitmask of buttons that starts the drag operation.
Step 4 − The target argument is a list of tuples of this structure −
(target, flags, info)
The target argument is a string representing drag type, for example, text/plain or image/x-xpixmap.
Step 6 − The following flags are predefined −
- gtk.TARGET_SAME_APP
- gtk.TARGET_SAME_WIDGET
Step 7 − There will be no limitation as the flag is set to 0.
If the widget is not required to act as source, it can be unset −
widget.drag_source_unset()
The source signal emits signals. The following table lists the signals and their callbacks.
| drag_begin | def drag_begin_cb(widget, drag_context, data): |
| drag_data_get | def drag_data_get_cb(widget, drag_context, selection_data, info, time, data): |
| drag_data_delete | def drag_data_delete_cb(widget, drag_context, data): |
| drag_end | def drag_end_cb(widget, drag_context, data): |
Setting up a Destination Widget
The drag_dest_set() method specifies which widget can receive dragged data.
widget.drag_dest_set(flags, targets, action)
The flags parameter can take one of the following constants −
| gtk.DEST_DEFAULT_MOTION | This checks if the drag matches this widget's list of possible targets and actions, then calls the drag_status() as appropriate. |
| gtk.DEST_DEFAULT_HIGHLIGHT | This draws a highlight on this widget as long as a drag is over this widget |
| gtk.DEST_DEFAULT_DROP | When a drop occurs, if the drag matches this widget's list of possible targets and actions call drag_get_data() on behalf of the widget. Whether or not the drop is successful, call drag_finish(). If the action was a move and the drag was successful, then TRUE will be passed for the delete parameter to drag_finish(). |
| gtk.DEST_DEFAULT_ALL | If set, specifies that all default actions should be taken. |
The target is a list of tuples containing target information. The actions argument is a bitmask of or a combination of one or more of the following values −
- gtk.gdk.ACTION_DEFAULT
- gtk.gdk.ACTION_COPY
- gtk.gdk.ACTION_MOVE
- gtk.gdk.ACTION_LINK
- gtk.gdk.ACTION_PRIVATE
- gtk.gdk.ACTION_ASK
The "drag-motion" handler must determine if the drag data is appropriate by matching the destination targets with the gtk.gdk.DragContext targets and optionally by examining the drag data by calling the drag_get_data()method. The gtk.gdk.DragContext. drag_status() method must be called to update the drag_context status.
The "drag-drop" handler must determine the matching target using the drag_dest_find_target() method and then ask for the drag data using the drag_get_data() method. The data will be available in the "drag-data-received" handler.
PyGTK - Timeout
PyGTK - Timeout
The gobject module of the PyGTK API has a useful function to create a timeout function that will be called periodically.
source_id = gobject.timeout_add(interval, function, …)
The second argument is the callback function you wish to have called after every millisecond which is the value of the first argument – interval. Additional arguments may be passed to the callback as function data.
The return value of this function is source_id. Using it, the callback function is stopped from calling.
gobject.source_remove(source_id)
The callback function must return True in order to keep repeating. Therefore, it can be stopped by returning False.
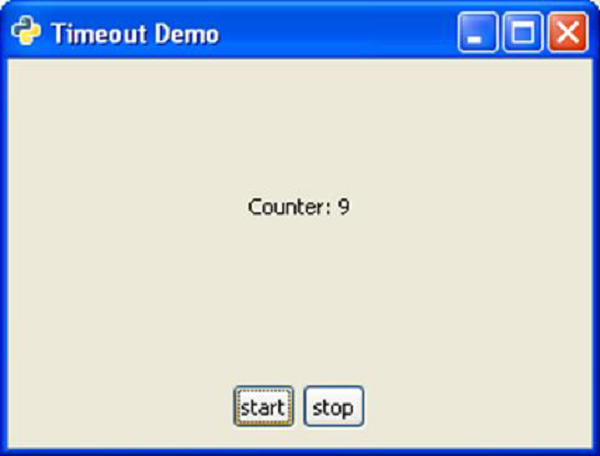
Two buttons and two labels are put on a toplevel window in the following program. One label displays an incrementing number. The btn1 calls on_clickwhich sets the timeout function with an interval of 1000 ms (1 second).
btn1.connect("clicked", self.on_click)
def on_click(self, widget):
self.source_id = gobject.timeout_add(1000, counter, self)
The timeout function is named as counter(). It increments the number on a label after every 1 second.
def counter(timer):
c=timer.count+1
print c
timer.count=c
timer.lbl.set_label(str(c))
return True
The Callback on the second button removes the timeout function.
btn2.connect("clicked", self.on_stop)
def on_stop(self, widget):
gobject.source_remove(self.source_id)
Example
The following is the complete code for the Timeout example −
import gtk, gobject
def counter(timer):
      c = timer.count+1
      print c
      timer.count = c
      timer.lbl.set_label(str(c))
      return True
      class PyApp(gtk.Window):

   def __init__(self):
      super(PyApp, self).__init__()
      self.set_title("Timeout Demo")
      self.set_size_request(300, 200)
      self.set_position(gtk.WIN_POS_CENTER)

      vbox = gtk.VBox(False, 5)
      hbox = gtk.HBox(True, 3)

      hb = gtk.HBox()
      lbl1 = gtk.Label("Counter: ")

      hb.add(lbl1)
      self.lbl = gtk.Label("")
      hb.add(self.lbl)
      valign = gtk.Alignment(0.5, 0.5, 0, 0)
      valign.add(hb)
      vbox.pack_start(valign, True, True, 10)

      btn1 = gtk.Button("start")
      btn2 = gtk.Button("stop")

      self.count = 0
      self.source_id = 0

      hbox.add(btn1)
      hbox.add(btn2)

      halign = gtk.Alignment(0.5, 0.5, 0, 0)
      halign.add(hbox)

      vbox.pack_start(halign, False, True, 10)
      self.add(vbox)

      btn1.connect("clicked", self.on_click)
      btn2.connect("clicked", self.on_stop)

      self.connect("destroy", gtk.main_quit)
      self.show_all()

   def on_click(self, widget):
      self.source_id = gobject.timeout_add(1000, counter, self)

   def on_stop(self, widget):
      gobject.source_remove(self.source_id)
PyApp()
gtk.main()
When executed, the window shows two buttons at the bottom. The number on the label will increment periodically when the Start button is clicked on and it will stop incrementing when the Stop button is clicked on.
Observe the output −
PyGTK - Ruler Class
PyGTK - Ruler Class
This is a base class for horizontal (gtk.Hruler) and vertical (gtk.Vruler) rulers that are useful to show mouse pointer's position in window. A small triangle in the ruler indicates the location of pointer.
Ruler objects are created with their respective constructors −
hrule = gtk.Hruler()
vrule = gtk.Vruler()
The following gtk.Ruler class methods are available for both the derived classes −
- Ruler.set_metric() − This sets the measurement unit. The predefined metric constants are: gtk.PIXELS (default), gtk.INCHES and gtk.CENTIMETERS
- Ruler.set_range() − This sets the lower and upper bounds, position and maximum size of ruler.
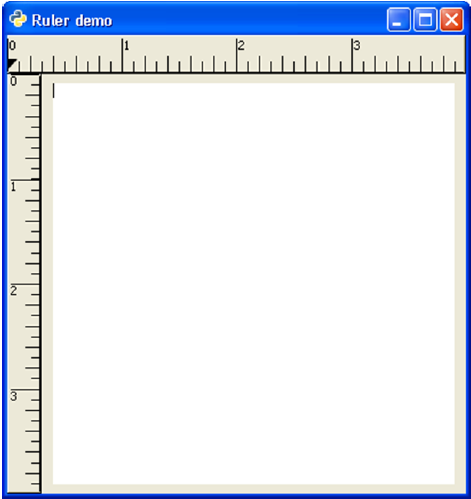
In the example given below, the horizontal and vertical rulers are placed above and to the left of a gtk.TextView widget.
The measurement of horizontal ruler is in pixels. Its minimum and maximum values are 0 and 400 respectively. It is placed in the upper row of a gtk.VBox.
hrule = gtk.HRuler()
hrule.set_metric(gtk.PIXELS)
hrule.set_range(0, 4,0,0.5)
vbox.pack_start(hrule)
The lower row of Vbox contains an HBox. A vertical ruler and a TextView widget, in which a multi-line text can be entered, is packed.
vrule=gtk.VRuler()
vrule.set_metric(gtk.PIXELS)
vrule.set_range(0, 4, 10, 0.5)
hbox.pack_start(vrule)
Example
Observe the following code −
import gtk
class PyApp(gtk.Window):
   def __init__(self):
      super(PyApp, self).__init__()
      self.set_title("Ruler demo")
      self.set_size_request(400,400)
      self.set_position(gtk.WIN_POS_CENTER)

      vbox = gtk.VBox()
      tv = gtk.TextView()
      tv.set_size_request(350,350)

      hrule = gtk.HRuler()
      hrule.set_metric(gtk.PIXELS)
      hrule.set_range(0, 4,0,0.5)

      vbox.pack_start(hrule)
      hbox = gtk.HBox()
      vrule = gtk.VRuler()

      vrule.set_metric(gtk.PIXELS)
      vrule.set_range(0, 4, 10, 0.5)

      hbox.pack_start(vrule)
      halign = gtk.Alignment(0.5, 0.5, 0, 0)
      halign.add(tv)

      hbox.pack_start(halign, False, True, 10)
      vbox.add(hbox)

      self.add(vbox)
      self.connect("destroy", gtk.main_quit)
      self.show_all()
PyApp()
gtk.main()
The output generated by the above program resembles an MS Word document −
PyGTK - Clipboard Class
PyGTK - Clipboard Class
A Clipboard object holds shared data between two processes or two widgets of the same application. The gtk.Clipboard is a high level interface for the gtk.SelectionData class.
The following is a prototype of the gtk.Clipboard constructor −
gtk.Clipboard(display,selction)
Here, the display parameter corresponds to the gtk.gdk.Display object for which the clipboard is to be created or retrieved. By default, it is the standard output device. The selection parameter defaults to CLIPBOARD, an object representing an interned string.
PyGTK provides a convenience function to create a clipboard object with defaults.
gtk.clipboard.get()
gtk.Clipboard class has the following methods −
- Clipboard.store() − This stores the current clipboard data somewhere so that it will stay around even after the application has quit.
- Clipboard.clear() − This removes the contents of the clipboard.
- Clipboard.set_text(text) − This sets the contents of the clipboard to the string.
- Clipboard.request_text() − This requests the contents of the clipboard as text. When the text is later received, callback will be called with the data specified by user_data. The signature of callback is:
- def callback(clipboard, text, data) − text will contain the textretrieved from clipboard.
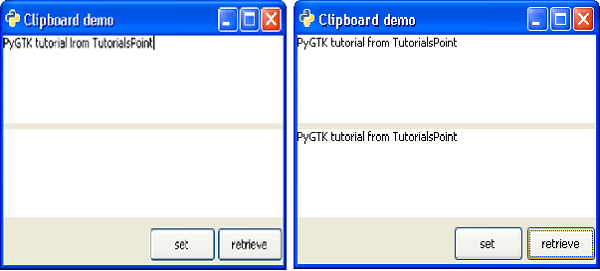
As a demonstration of clipboard, the following code uses two TextViews and two buttons on a toplevel gtk.Window. The 'Set' button calls the on_set()function which puts the text from first textView on the clipboard.
buf = self.tv1.get_buffer()
text = buf.get_text(buf.get_start_iter(), buf.get_end_iter())
self.clipboard = gtk.clipboard_get()
self.clipboard.set_text(text)
self.clipboard.store()
When the second button ('retrieved') is pressed, the data from clipboard is fetched by the request_text() method −
self.clipboard.request_text(self.readclipboard, user_data = None)
The content of user_data goes to a callback method readclipboard() which displays it on second textview.
def readclipboard(self, clipboard, text, data):
buffer = gtk.TextBuffer()
buffer.set_text(text)
self.tv2.set_buffer(buffer)
Example
The following is the entire code for clipboard operation −
import gtk
class PyApp(gtk.Window):
   def __init__(self):
      super(PyApp, self).__init__()
      self.set_title("Clipboard demo")
      self.set_size_request(300,200)
      self.set_position(gtk.WIN_POS_CENTER)

      vbox = gtk.VBox(False, 5)
      self.tv1 = gtk.TextView()

      vbox.add(self.tv1)
      self.tv2 = gtk.TextView()

      vbox.add(self.tv2)
      hbox = gtk.HBox(True, 3)

      Set = gtk.Button("set")
      Set.set_size_request(70, 30)

      retrieve = gtk.Button("retrieve")
      hbox.add(Set)
      hbox.add(retrieve)
      halign = gtk.Alignment(1, 0, 0, 0)
      halign.add(hbox)

      vbox.pack_start(halign, False, False, 3)
      self.add(vbox)
      Set.connect("clicked", self.on_set)
      retrieve.connect("clicked", self.on_retrieve)
      self.connect("destroy", gtk.main_quit)
      self.show_all()

   def on_set(self, widget):
      buf = self.tv1.get_buffer()
      text = buf.get_text(buf.get_start_iter(), buf.get_end_iter())
      self.clipboard = gtk.clipboard_get()
      self.clipboard.set_text(text)
      self.clipboard.store()

   def on_retrieve(self, widget):
      self.clipboard.request_text(self.readclipboard, user_data=None)

   def readclipboard(self, clipboard, text, data):
      buffer = gtk.TextBuffer()
      buffer.set_text(text)
      self.tv2.set_buffer(buffer)
PyApp()
gtk.main()
The above code will generate the following output −
PyGTK - Calendar Class
PyGTK - Calendar Class
The Calendar widget in PyGTK toolkit displays a simple calendar with one month view at a time. The navigation controls to change month and year are displayed by default. The display options can be suitably configured.
The value of month property is between 0 to 11, and that of date property is between 1 to 31.
There is a simple constructor to create a gtk.Calendar object −
cal = gtk.Calendar()
The default display style shows the current month and year as well as names of days.
The gtk.Calendar class has the following methods −
- Calendar.select_month(mm,yy) — This changes the calendar display to the specified mm and yy.
- Calendar.select_day(dd) — This selects the specified dd on the calendar when it has a value between 1 and 31. If dd is 0 then the current day selection is removed.
- Calendar.display_options() — This sets the calendar display options to the value specified by flags. The possible display options are a combination of:
| gtk.CALENDAR_SHOW_HEADING | Specifies that the month and year should be displayed. |
| gtk.CALENDAR_SHOW_DAY_NAMES | Specifies that three letter day descriptions should be present. |
| gtk.CALENDAR_NO_MONTH_CHANGE | Prevents the user from switching months with the calendar. |
| gtk.CALENDAR_SHOW_WEEK_NUMBERS | Displays each week numbers of the current year, down the left side of the calendar. |
| gtk.CALENDAR_WEEK_START_MONDAY | Starts the calendar week on Monday, instead of the default Sunday. |
- Calendar.get_date() — This retrieves the calendar's current year, month and selected day numbers as a tuple (year, month, day).
The gtk.Calendar widget emits the following signals −
| day-selected | This is emitted when a day is selected either by the user or programmatically. |
| month-changed | This is emitted when the calendar month is changed programmatically or by the user. |
| next-month | This is emitted when the user clicks the "next-month" navigation control in the calendar header. |
| next-year | This is emitted when the user clicks the "next-year" navigation control in the calendar header. |
| prev-month | This is emitted when the user clicks the "prev-month" navigation control in the calendar header. |
| prev-year | This is emitted when the user clicks the "prev-year" navigation control in the calendar header. |
In the following example, a gtk.Calendar control and four buttons are placed in the toplevel window.
When the 'heading' button is clicked, the Calendar's display options are set to SHOW_HEADING −
def heading(self, widget):
   self.cal.set_display_options(gtk.CALENDAR_SHOW_HEADING)
When the user clicks the 'day name' button, the callback sets display options to SHOW_DAY_NAMES −
def dayname(self, widget):
self.cal.set_display_options(gtk.CALENDAR_SHOW_DAY_NAMES)
Both the display options are enabled when 'both' button is pressed. To begin with, all flags of display options are removed by setting it to 0.
self.cal.set_display_options(0)
The 'set' button pops up a message box displaying the currently marked date.
tp = self.cal.get_date()
str1 = str(tp[0])
str2 = str(tp[1]+1)
str3 = str(tp[2])
label = gtk.Label("Date selected:"+str3+"-"+str2+"-"+str1)
dialog.vbox.add(label)
label.show()
Example
Observe the following code −
import gtk
class PyApp(gtk.Window):

   def __init__(self):
      super(PyApp, self).__init__()
      self.set_title("Calendar Demo")
      self.set_size_request(300, 200)
      self.set_position(gtk.WIN_POS_CENTER)

      vbox = gtk.VBox(False, 5)
      self.cal = gtk.Calendar()
      halign1 = gtk.Alignment(0.5, 0.5, 0, 0)
      halign1.add(self.cal)

      self.cal.set_display_options(0)
      valign = gtk.Alignment(0, 1, 0, 0)
      vbox.pack_start(halign1)

      self.btn1 = gtk.Button("set")
      self.btn2 = gtk.Button("heading")
      self.btn3 = gtk.Button("day name")
      self.btn4 = gtk.Button("Both")

      hbox = gtk.HBox(True, 3)
      hbox.add(self.btn1)
      hbox.add(self.btn2)
      hbox.add(self.btn3)
      hbox.add(self.btn4)

      halign = gtk.Alignment(0.5, 0.5, 0, 0)
      halign.add(hbox)

      vbox.pack_start(halign, False, True, 10)
      self.add(vbox)

      self.btn1.connect("clicked", self.selectdate)
      self.btn2.connect("clicked", self.heading)
      self.btn3.connect("clicked", self.dayname)
      self.btn4.connect("clicked", self.bothflags)

      self.connect("destroy", gtk.main_quit)
      self.show_all()

   def heading(self, widget):
      self.cal.set_display_options(gtk.CALENDAR_SHOW_HEADING)

   def dayname(self, widget):
      self.cal.set_display_options(gtk.CALENDAR_SHOW_DAY_NAMES)

   def bothflags(self, widget):
      self.cal.set_display_options(gtk.CALENDAR_SHOW_HEADING|gtk.CALENDAR_SHOW_DAY_NAMES)
   def selectdate(self, widget):
      tp = self.cal.get_date()
      dialog = gtk.Dialog("My dialog",
      self,
      gtk.DIALOG_MODAL | gtk.DIALOG_DESTROY_WITH_PARENT,
      (gtk.STOCK_OK, gtk.RESPONSE_ACCEPT))

      str1 = str(tp[0])
      str2 = str(tp[1]+1)
      str3 = str(tp[2])

      label = gtk.Label("Date selected:"+str3+"-"+str2+"-"+str1)
      dialog.vbox.add(label)
      label.show()
      res = dialog.run()
      dialog.destroy()
PyApp()
gtk.main()
The above code will generate the following output −

Subscribe to:
Comments (Atom)